How to Use Lora in Stable Diffusion - A Step-by-Step Guide
Unlock the secrets of creating your own LoRA models for Stable Diffusion with our step-by-step guide, and elevate your AI art generation skills to new heights! Explore the world of AI creativity and discover tools like Anakin AI's Image Generator to further enhance your artistic journey.
In the ever-evolving landscape of AI-driven art, Lora models have emerged as a game changer, especially within the Stable Diffusion ecosystem. These models represent a cutting-edge approach, offering a unique blend of efficiency and creativity. But what exactly are Lora models, and why are they becoming indispensable tools for digital artists and enthusiasts alike? This article delves into the world of Lora Stable Diffusion, guiding you through its fundamentals and practical applications.
Want to test out the features of Stable Diffusion Online?
Lora, standing for Low-Rank Adaptation, is a gaming-chaging technique specifically designed for fine-tuning Stable Diffusion models. At its core, Lora models are compact and powerful, capable of applying subtle yet impactful modifications to standard checkpoint models in Stable Diffusion. Their size, often 10 to 100 times smaller than traditional models, makes them a highly attractive option for those who manage extensive collections of models or operate on limited storage.
Work of LoRA with Stable Diffusion
Unlike conventional training methods like Dreambooth or textual inversion, Lora strikes an impressive balance.
While Dreambooth yields powerful results, it leads to large file sizes, typically ranging between 2 to 7 GBs.
Textual inversions, though small in size (around 100 KBs), offer limited flexibility.
Lora models find their niche in the middle – offering decent training power with significantly smaller file sizes (2 – 200 MBs).
Why Lora Makes a Difference
For users who love experimenting with different models in Stable Diffusion, Lora models are a blessing.
LoRA offer an effective solution to the common problem of rapidly filling local storage.
Lora models, when used alongside a model checkpoint file, bring a unique flair to AI-generated art without the burden of excessive storage requirements.
Where Can I Download LoRAs?
LoRAs are available for download on platforms like CivitAI. Use the search bar and filter for LoRA to find a wide range of options.
How to Install LoRAs in AUTOMATIC1111 WebUI
Downloading LoRAs: After identifying the LoRA models you want, download the LoRA file and place in this folder: stable-diffusion-webui/models/Lora.
Load Checkpoint odel: Start the AUTOMATIC1111 WebUI. Choose your checkpoint model as usual, preferably using the base model specified in the LoRA's description.
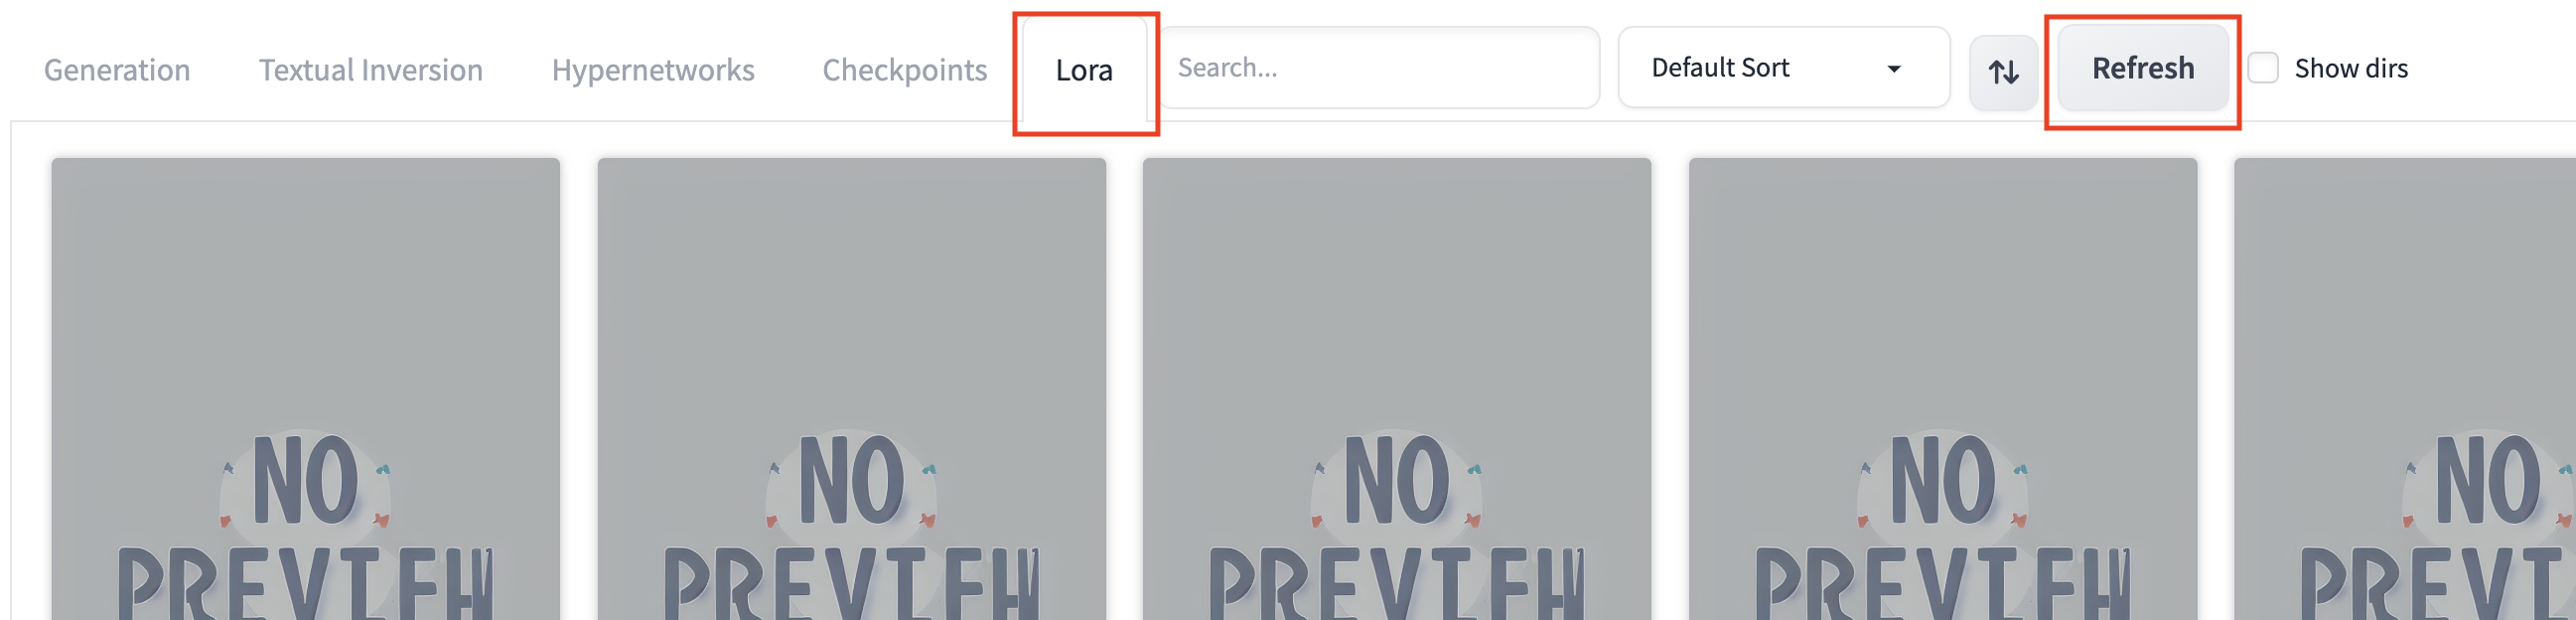
Activate LoRA in Automatic1111 WebUI:
Activate LoRA in Automatic1111 WebUI
Navigate to the 'Lora' section.
Click on “Refresh”.
Select the desired LoRA, which will add a tag in the prompt, like <lora:FilmGX4:1>.
4. Using LoRA in Prompts: Continue to write your prompts as usual, and the selected LoRA will influence the output. Adjust the weight after the colon to modify the LoRA's influence, for example, <lora:LoRA_Trigger_Word:0.8>.
A default weight of 1 is standard, but you can adjust this to fine-tune the influence of the Lora model on your output.
Best Loras You Can Download Now
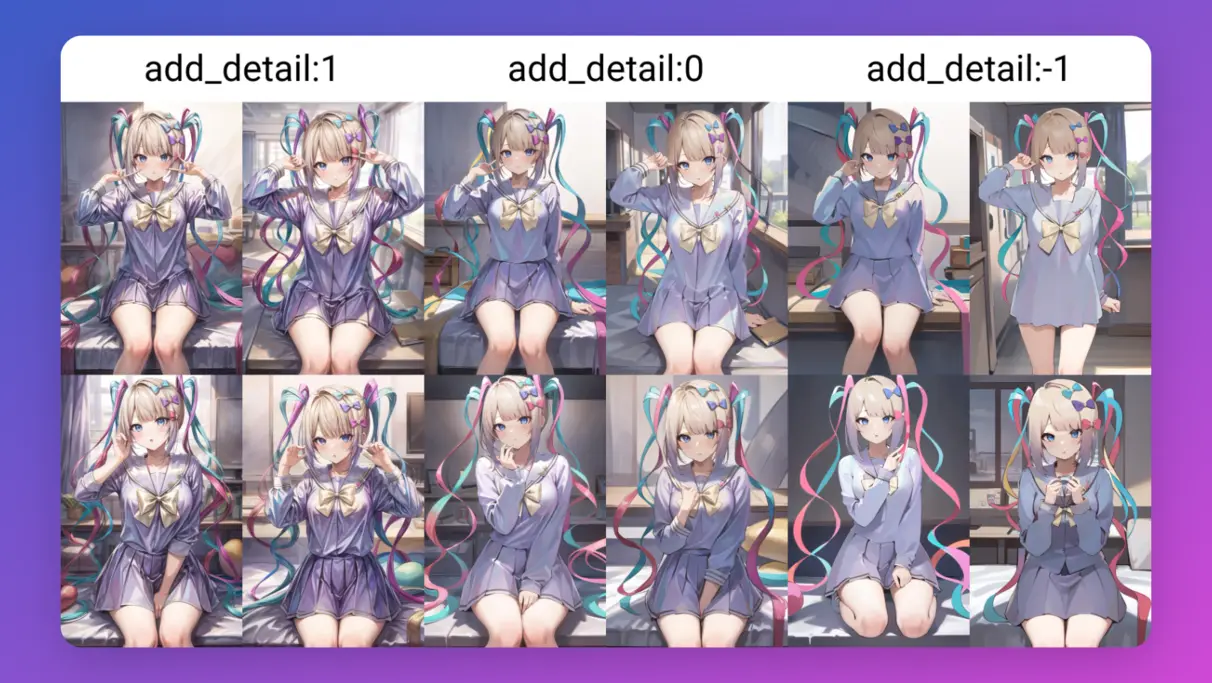
1. Detail Tweaker LoRA
Detail Tweaker LoRA
Description: Ideal for modifying details in images, this LoRA is versatile across various styles, including anime and realistic models. It's designed to either enhance or reduce details while preserving the overall aesthetic.
Trigger Words: add_detail
Usage: Apply with weights ranging from 2 to -2, with negative values for reducing details.
Pros: Offers flexibility in detail management, suitable for both intricate and simplified imagery.
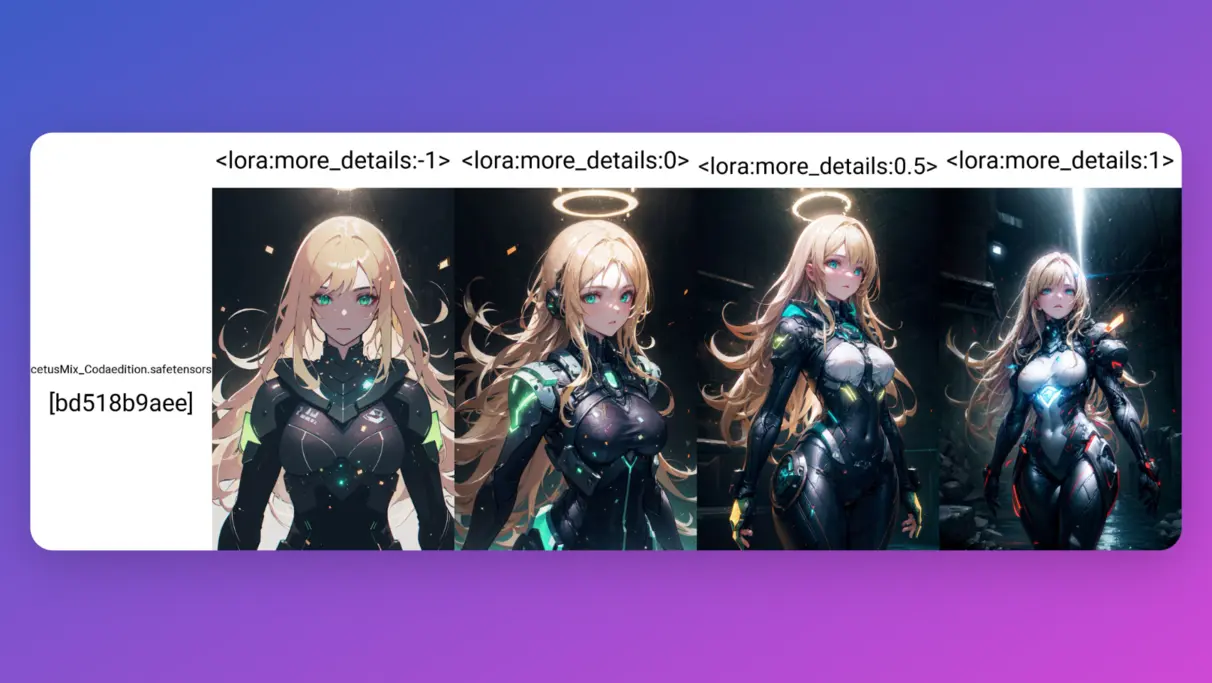
2. Add More Details - Detail Enhancer / Tweaker LoRA
Add More Details LoRA
Description: A powerful tool for enhancing image details, this LoRA can significantly boost intricacies in various types of artwork, from portraits to landscapes.
Trigger Words: add_more_details
Usage: Best used with weights between 0.5 and 1, but can go lower for subtler effects.
Pros: Effective in adding depth and complexity to images, works well for both subtle and prominent enhancements.
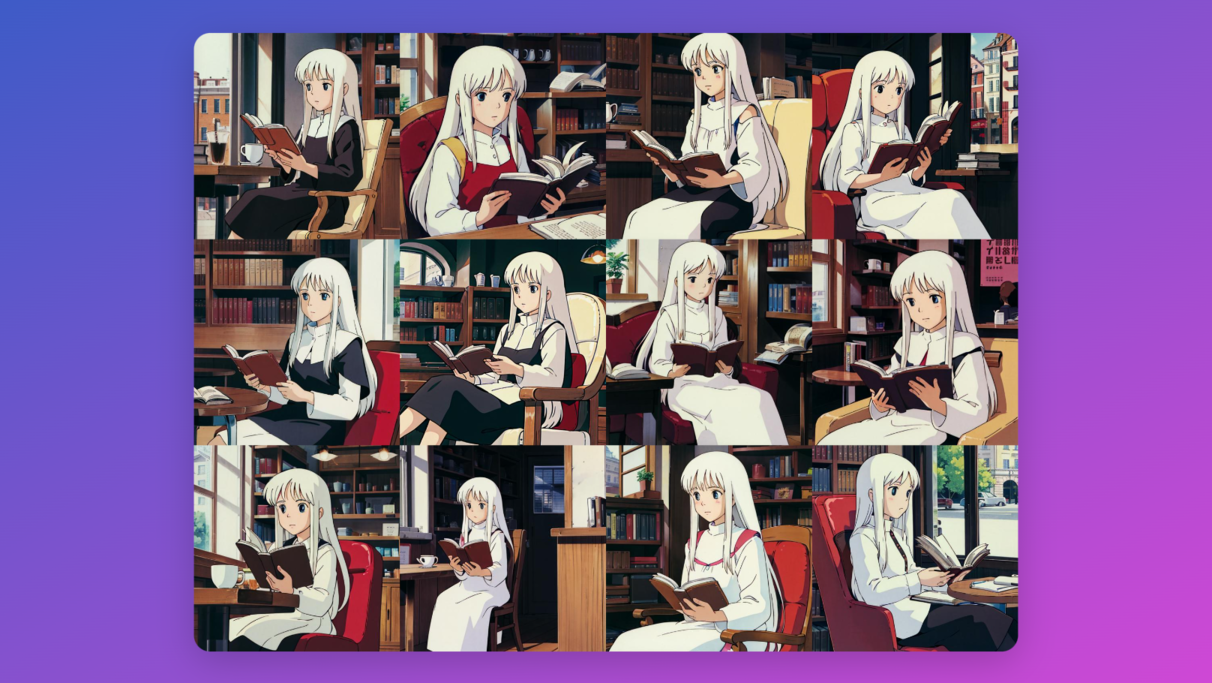
Description: This LoRA captures the essence of the iconic Studio Ghibli style, ideal for transforming images into the renowned animation studio's unique artistic flavor.
Trigger Words: "GHIBLI STYLE"
Usage: Recommended weight is around 1 for the offset version and 0.65 for the old one, especially effective on Anything v4.5 and AbyssOrangeMix2.
Pros: Perfect for fans of Studio Ghibli's art style, offering authentic recreations with flexibility across different characters and themes.
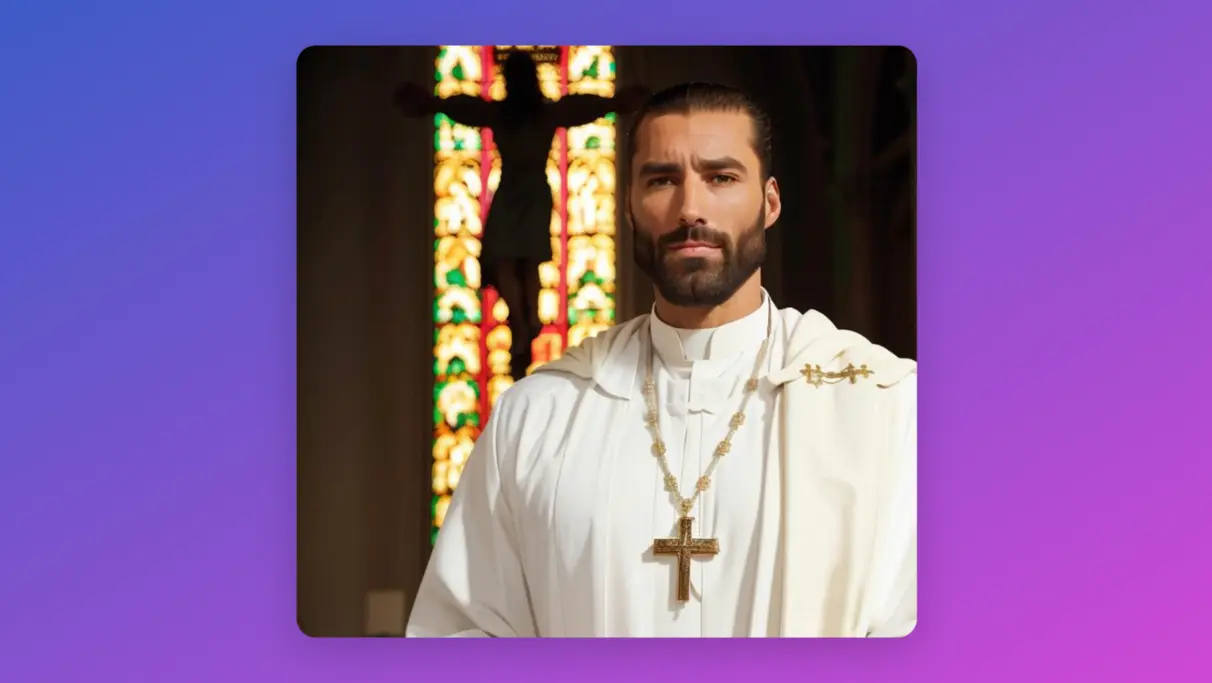
Description: Tailored for generating images with a 'Gigachad' aesthetic, this LoRA adds a muscular, photorealistic, and charismatic touch to portraits and character art.
Trigger Words: "GIGACHAD"
Usage: The strength of the effect varies with the LoRA weight, with closer to 1 producing the ultimate 'Gigachad' effect.
Pros: Ideal for creating strong, muscular, and striking characters in a variety of settings.
Each of these LoRa models offers unique capabilities to enhance and transform your AI-generated artworks in Stable Diffusion, enabling a wide range of artistic expressions.
Want to test out the features of Stable Diffusion Online?
Creating a LoRA (Low-Rank Adaptation) model for Stable Diffusion is a process that involves several key steps, from setting up your environment to training and testing your model. Here's a detailed guide, rephrased and structured differently from your original input:
Prerequisites
Before diving into the creation of a LoRA model, ensure you have a basic grasp of checkpoint models in Stable Diffusion. This guide assumes familiarity with these concepts and focuses on leveraging online tools and resources for LoRA creation.
What Do You Need to Create a LoRA
The process primarily utilizes tools and resources available online, specifically from GitHub. An active internet connection is necessary, and the process can even be executed on a smartphone. A fundamental understanding of LoRAs and their application in Stable Diffusion is required, along with patience to navigate through the learning curve.
Step-by-Step Guide to Create a LoRA
Step 1. Get Ready for Your Dataset
The first and most critical step is the assembly of a quality dataset. A dataset in this context refers to a collection of images and their corresponding descriptions. The pairing of each image (like "1.png") with a text file (like "1.txt") forms the basis of your dataset.
Image Collection: You can gather images from online sources, ensuring they represent the variety you want the AI to learn, such as different poses, angles, and backgrounds.
Description Writing: The descriptions should be detailed and specific. For general images, straightforward descriptions are needed, whereas, for anime images, booru tags (like '1girl', 'blonde hair') are more suitable.
Step 2. Process Dataset (with Google Colab)
This Google Colab Notebook provides an accessible platform to process your dataset using Google's computing resources.
Colab Setup: Connect your Google Drive, choose a project name, and set up your folder structure. Run the initial setup script in Colab to link your Google Drive.
Image Scraping for Anime Styles: Utilize Gelbooru's extensive collection for anime-styled images, filtering through tags that match your desired concept.
Image Curation: Use AI tools like FiftyOne to detect and eliminate duplicate images. Manually curate the images to ensure quality and relevance.
Automated Tagging: Use AI tagging tools for assigning relevant tags to your anime images, or create descriptive captions for more realistic images.
Tag Curation: Refine your tags, and if necessary, assign an activation tag. This tag is crucial as it becomes the reference point for your LoRA.
Step 3. Now, You Can Train Your LoRA
With your dataset ready, the next phase is training your LoRA model.
Google Colab for Training: Continue using Google Colab for the training process, leveraging its resources.
Model and Dataset Settings: Configure settings related to the model and how your dataset is processed. This includes resolution settings and augmentation options.
Training Parameters: Adjust the training steps, epochs, batch size, and learning rates. These settings will depend on the number of images in your dataset and the desired complexity of your LoRA.
LoRA Type Selection: Choose the type of LoRA you are creating, whether it's the classic LoRA or a more layered version like LoCon, and set the dimensions accordingly.
Executing the Training Process: Run the training script in Colab, which will utilize your dataset to train the LoRA model.
Step 4. Don't Forget: Testing and Refinement
After training, test your LoRA model to evaluate its effectiveness.
Download Trained Models: Retrieve different versions of your trained LoRA from Google Drive, each representing a different training epoch.
Test Runs: Implement the LoRA in Stable Diffusion prompts, adjusting weights and settings to gauge the model's performance.
Comparison and Adjustment: Compare different epochs of your LoRA to determine the most effective version. Adjust weights and tags in your prompts to fine-tune the output.
Conclusion
In conclusion, creating a LoRA model for Stable Diffusion is an enriching and educational process, offering a deep dive into the intricacies of AI-driven art generation.
As you continue exploring and refining your skills in LoRA creation, consider utilizing Anakin AI's Stable Diffusion Image Generator for further experimentation and learning.
This tool can provide additional insights and enhance your understanding of AI art generation, complementing your journey in the fascinating world of AI and creativity.