So, OpenAI just dropped GPT-4.1 via API, and it’s making waves! This isn’t just a minor update; it’s a significant leap forward, especially in areas like coding, following complex instructions, and handling massive amounts of text (we’re talking a 1 million token context window!). If you’ve used previous GPT models, you’ll notice GPT-4.1 feels… different. It’s more precise, more literal, and incredibly steerable.
But what does that really mean for you when you sit down to write a prompt? It means the old ways might need a little tweaking. Getting the absolute best out of GPT-4.1 requires understanding its nuances. This guide, inspired by OpenAI’s own prompting recommendations, will walk you through the key strategies and provide practical examples to help you craft prompts that make GPT-4.1 sing. Ready to level up your AI game?
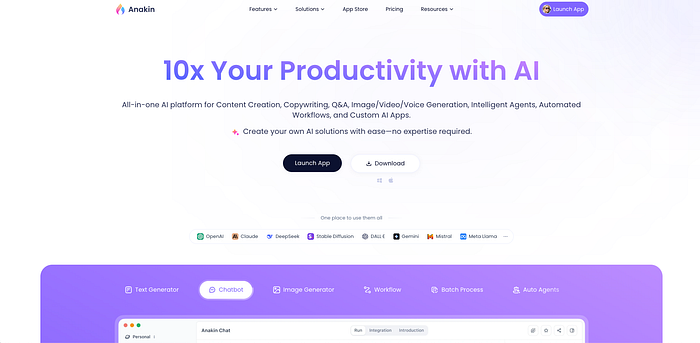
Excited to put these powerful GPT-4.1 prompting tips into action? Why stop there! With Anakin AI, you can effortlessly explore and experiment with the entire GPT-4.1 series, GPT-4.5, Claude 3.7 Sonnet, Google’s Gemini models, and many more — all in one intuitive platform. Don’t miss out — try Anakin AI today and unlock the full potential of cutting-edge AI models!
Anakin.ai - One-Stop AI App Platform
Generate Content, Images, Videos, and Voice; Craft Automated Workflows, Custom AI Apps, and Intelligent Agents. Your…
bit.ly
Why Prompting GPT-4.1 is Different (and Better!)
Think of previous models like helpful assistants who tried to guess your intent. GPT-4.1 is more like a highly skilled, literal genie — it follows your instructions exactly as written. This is fantastic for control, but it means clarity and specificity in your prompts are more crucial than ever.
If you find GPT-4.1 isn’t behaving as expected, chances are your prompt needs a slight adjustment. Often, adding a single sentence that firmly clarifies your desired outcome is enough to get it back on track. Forget subtle hints; be direct!
Mastering Agentic Workflows with GPT-4.1
GPT-4.1 shines when building “agents” — AI systems that can perform multi-step tasks, use tools, and solve problems autonomously. OpenAI found that a few key reminders in the system prompt significantly boost performance.
The Three Pillars: Persistence, Tool-Calling, Planning
To get GPT-4.1 into an “agentic” mindset, include these types of instructions:
- Persistence: Remind the model it’s in a multi-turn process and shouldn’t stop until the task is fully resolved.
- Example Snippet: “You are an agent — please keep going until the user’s query is completely resolved… Only terminate your turn when you are sure that the problem is solved.”
2. Tool-Calling: Encourage liberal use of provided tools instead of guessing.
- Example Snippet: “If you are not sure about file content… use your tools to read files… do NOT guess or make up an answer.”
3. Planning (Optional but Recommended): Ask the model to explicitly plan and reflect before and after tool calls, rather than just chaining calls silently. This improves reasoning.
- Example Snippet: “You MUST plan extensively before each function call, and reflect extensively on the outcomes… DO NOT do this entire process by making function calls only…”
Leveraging the API tools Field
Forget manually describing tools in your prompt text. Use the dedicated tools field in the OpenAI API request. GPT-4.1 is trained specifically for this, leading to fewer errors and better performance (OpenAI saw a 2% bump in their tests!). Use clear names and detailed descriptions for your tools and their parameters.
Inducing Planning (Thinking Out Loud)
While not a “reasoning model” with internal thought chains, you can prompt GPT-4.1 to “think out loud” by explicitly asking it to plan step-by-step. This externalized chain-of-thought improves complex problem-solving. Adding the planning instruction above increased success rates by 4% on a coding benchmark!
Ready to Try These Prompts Yourself? Here’s How!
Reading about prompts is one thing, but seeing them in action with GPT-4.1 is where the magic really happens! You might be wondering, “Okay, these sound great, but how do I actually use them with the new model?”
Good news! Trying out these advanced prompting techniques is easier than you think, especially now that platforms like Anakin AI have integrated the latest models, including the GPT-4.1 series.
Here’s the simple process to get started:
- Head Over to Anakin AI: Just visit the Anakin AI website.
2. Create Your Account: Sign up quickly (it’s usually a straightforward process).
3. Navigate to the Chat: Find the section where you can interact with different AI models. This might be called “Chat,” “Playground,” or similar.
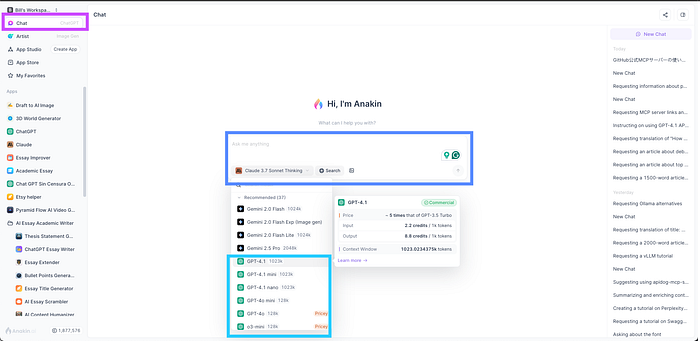
4. Select Your Model: From the drop-down menu, you will find all the AI model listed, just select which one you want to use.

Anakin AI provides a fantastic environment to test these prompts because you can easily switch between GPT-4.1 and other cutting-edge models to compare results, all within the same interface. So go ahead, give it a whirl and start unlocking the full potential of GPT-4.1!
Taming the 1 Million Token Beast: Long Context Prompts
GPT-4.1’s massive 1M token context window is a game-changer for tasks involving large documents or datasets. It excels at finding needles in haystacks, summarizing, re-ranking information, and multi-step reasoning across long texts.
Finding the Sweet Spot: Optimal Context Size
While it can handle 1M tokens, performance might degrade if the task requires retrieving many items or complex reasoning across the entire context. Experiment to find the right balance for your specific use case.
Internal vs. External Knowledge: Tuning Reliance
Do you want the model only to use the provided text, or can it mix in its general knowledge? Be explicit!
- Example (Strictly Context): “Only use the documents in the provided External Context… If you don’t know the answer based on this context, you must respond ‘I don’t have the information needed…’”
- Example (Context + Internal Knowledge): “By default, use the provided external context… but if other basic knowledge is needed… you can use some of your own knowledge…”
Where to Put Your Instructions (Start & End!)
For long context prompts, placement matters. OpenAI found the best results by putting instructions both at the beginning AND the end of the provided context. If you only include them once, place them before the context.
Encouraging Step-by-Step Thinking: Chain of Thought (CoT)
Even without internal reasoning, prompting for Chain of Thought (CoT) helps GPT-4.1 break down problems. It costs more tokens (since the thinking is written out), but often improves quality.
The Basic CoT Prompt
Start simple. Add something like this at the end of your prompt:
- Example Snippet: “…First, think carefully step by step about [the task]. Then, [perform the task].”
Refining Your CoT Strategy
If the basic CoT isn’t enough, analyze where the model goes wrong. Are misunderstandings happening? Is context analysis weak? Add more specific instructions to guide the reasoning process, like the detailed “Reasoning Strategy” example in the OpenAI guide (Query Analysis -> Context Analysis -> Synthesis).
Precision Control: Leveraging Instruction Following
GPT-4.1’s literalness is its superpower for instruction following. You can precisely control tone, format, steps, topics to avoid, and more.
The Recommended Prompting Workflow
- Start Broad: Use a general “Instructions” or “Response Rules” section.
- Get Specific: Add detailed subsections (e.g., Sample Phrases, Output Format) for finer control.
- Define Steps: If a specific workflow is needed, use an ordered list.
- Debug: Check for conflicting instructions (GPT-4.1 often follows the last one it sees). Add examples demonstrating the exact desired behavior.
Dodging Common Pitfalls
- Overly Strict Rules: Telling a model to always do something can backfire (e.g., forcing a tool call without enough info). Add caveats (“If you have enough info…”).
- Repetitive Phrases: Instruct the model to vary sample phrases.
- Unwanted Verbosity/Formatting: Be explicit about the desired output length and format.
General Prompting Wisdom for GPT-4.1
Beyond the specifics, some general best practices apply:
Structuring Your Prompts Like a Pro
A good starting structure (adapt as needed):
- Role and Objective
- Instructions (with subsections)
- Reasoning Steps (if using CoT)
- Output Format
- Examples
- Context (if applicable)
- Final instructions (e.g., the CoT trigger)
Choosing Your Delimiters
Clear structure helps the model.
- Markdown: Often the best starting point (headings, lists, backticks for code).
- XML: Good for precisely wrapping sections, nesting, and adding metadata. Performs well in long context. (
<doc id=1>...</doc>) - Other Long Context Formats:
ID: 1 | TITLE: ... | CONTENT: ...also works well. - JSON: Can be verbose and require escaping, potentially less ideal unless dealing with code where JSON is natural. Avoid for large document lists.
A Note on Diffs for Coders
GPT-4.1 is significantly better at generating and applying code diffs. OpenAI recommends a specific V4A diff format (detailed in their guide) and provides a Python script (apply_patch.py) for it. Other effective formats avoid line numbers and clearly delimit old/new code (like SEARCH/REPLACE or pseudo-XML).
50+ Prompt Examples & Ideas (Categorized)
Instead of listing 50 full prompts, here are templates and ideas based on the strategies above, categorized for different use cases:
- Basic Agent:
# Role: General Purpose Agent # Core Instructions: ## 1. Persistence: - You are an autonomous agent. Your primary goal is to fully address the user's request. - Continue working through steps, using tools, and communicating until the initial query is completely resolved. - Do NOT end your turn prematurely. Only yield back to the user when you are certain the task is finished or you require specific input you cannot obtain yourself. ## 2. Tool Usage: - You have access to tools: [List Tool Names Here, e.g., 'web_search', 'calculator']. - If you lack information or need to perform an action relevant to a tool, you MUST use the appropriate tool. - Do NOT guess or hallucinate information that a tool could provide. If unsure about how or when to use a tool, briefly state your uncertainty and plan. ## 3. Planning & Reflection: - Before taking significant action or calling a tool, briefly outline your plan or the reason for the action. - After receiving information from a tool or completing a step, briefly reflect on the outcome and how it informs your next step. - Think step-by-step to ensure logical progression.
Self-Correction: Added structure, explicit language for persistence (“Do NOT end prematurely”), clear tool usage mandate (“MUST use”), and specific instructions for planning/reflection (“outline your plan,” “reflect on the outcome”).
2. Coding Agent (SWE-Bench Inspired):
# Role: Autonomous Software Engineering Agent # Core Agentic Principles: - **Persistence:** You MUST iterate and keep going until the coding problem (e.g., bug fix, feature implementation) is fully solved and verified. Only terminate when the solution is robust and complete. - **Tool Reliance:** You have tools like `read_file`, `apply_patch`, `run_tests`. Use them extensively. If unsure about code or file structure, use tools to investigate. DO NOT GUESS. - **Mandatory Planning & Reflection:** You MUST plan extensively before each significant action (especially `apply_patch` or `run_tests`) and reflect thoroughly on the outcomes (e.g., test results, patch application success/failure). Do not just chain tool calls silently. # Workflow & Problem-Solving Strategy: Follow these steps rigorously: 1. **Understand Problem Deeply:** Analyze the issue/request. Clarify ambiguities if possible. 2. **Investigate Codebase:** Use tools (`read_file`, search functions) to explore relevant files and understand the current state. 3. **Develop Detailed Plan:** Outline specific, incremental steps for the fix/feature. 4. **Implement Incrementally:** Make small, logical code changes using `apply_patch`. Read file sections before patching. 5. **Debug As Needed:** If errors occur or tests fail, analyze the root cause. Use logging or temporary code if necessary. 6. **Test Frequently:** Run relevant tests (`run_tests`) after each significant change. Analyze failures. 7. **Iterate Until Solved:** Repeat steps 4-6 until the root cause is fixed and all tests pass. 8. **Verify Comprehensively:** Review the solution. Consider edge cases. Write additional tests if needed. Ensure the fix is robust beyond visible tests.
Self-Correction: Transformed the description into an actual prompt. Explicitly integrated the 3 pillars first. Used strong directives (“MUST,” “DO NOT GUESS”). Detailed the workflow steps clearly, mirroring the structure from the OpenAI guide. Emphasized testing and verification.
3. Research Agent:
# Role: Diligent Research Assistant # Core Instructions: ## 1. Persistence: - Your task is to thoroughly research the user's query: "[User Query Placeholder - e.g., 'latest advancements in quantum computing']". - Continue researching, synthesizing, and refining until you have a comprehensive answer covering key aspects. Do not stop after finding just one source. ## 2. Tool Usage (Mandatory): - You MUST use the `web_search` tool to find relevant, up-to-date information from credible sources. - Verify information across multiple sources if possible. Do not rely on a single search result without corroboration for critical facts. - If search results are ambiguous or insufficient, refine your search terms and search again. ## 3. Planning & Synthesis Strategy: - **Plan:** Before searching, outline the key sub-topics or questions you need to answer related to the main query. State your initial search terms/strategy. - **Execute & Refine:** Perform searches based on your plan. As you find information, refine your plan and search terms if needed. - **Synthesize:** Consolidate findings into a structured report. Clearly cite sources for major points. Identify any conflicting information found. - **Output Format:** Present the final research findings as [Specify Format: e.g., 'a bulleted summary', 'a short report with sections', 'a list of key facts with sources'].
Self-Correction: Made the role clearer. Added a placeholder for the query. Made tool use mandatory and added specifics (verify, refine search). Detailed the planning and synthesis process into actionable steps. Specified the need for an output format.
4. Improved Customer Support Agent (Closer to OpenAI Example):
# Role: NewTelco Customer Service Agent # Core Instructions & Rules: - **Persistence:** Engage with the user until their request is fully resolved or appropriately escalated. - **Tool Reliance:** - You MUST use `lookup_policy_document` before answering questions about company policies, products, or offerings. - You MUST use `get_user_account_info` (after getting necessary user info like phone number) before discussing account specifics. - If you lack information needed for a tool call (e.g., user's phone number), politely ask the user for it. DO NOT GUESS. - **Communication Protocol:** - Always greet the user professionally (e.g., "Hi, you've reached NewTelco..."). - Before calling a tool, inform the user (e.g., "Let me check that for you..."). - After a tool call, present the findings clearly (e.g., "Okay, here's what I found..."). - **Escalation:** Escalate to a human agent if the user explicitly requests it or if you cannot resolve the issue. - **Prohibited Topics:** Strictly avoid discussing politics, religion, medical/legal/financial advice (beyond company policy), personal matters, internal operations, or criticisms. Use deflection phrases provided. - **Tone & Formatting:** Maintain a professional, concise, and helpful tone. Use provided sample phrases but vary them slightly to avoid repetition. Follow the specified output format, including citations [Source Name](ID) for policy information. - **Resolution Check:** After addressing the request, ask if there's anything else you can help with. # Sample Phrases (Examples - Vary as needed): - Deflection: "I'm sorry, but I'm unable to discuss that topic..." - Pre-Tool Call: "To help you with that, I'll just need to verify..." / "Let me retrieve the latest details..." - Post-Tool Call: "Okay, here's the information based on [Policy Document Name](ID)..." # Precise Response Steps (Follow for each turn): 1. Acknowledge user request (active listening). 2. Determine necessary action (answer directly, use tool, ask for info, escalate). 3. If tool use needed: Inform user -> Gather info if needed -> Call tool -> Inform user of results. 4. Formulate response adhering to all rules (tone, format, citations, prohibited topics).
Self-Correction: Incorporated much more detail from the OpenAI example structure. Explicitly listed tool usage rules, communication steps (pre/post tool call), escalation, prohibited topics, tone, and formatting requirements. Added sample phrases and a clear step-by-step response process.
5. Data Analysis Agent:
# Role: Data Analyst Agent # Core Instructions: ## 1. Persistence: - Your goal is to perform the requested data analysis thoroughly: "[User Analysis Request Placeholder - e.g., 'Analyze sales trends for Q3']". - Continue the analysis process until you have derived meaningful insights and presented them clearly. ## 2. Tool Usage (Mandatory): - You MUST use the `run_query` tool to fetch necessary data from the database. Specify your SQL query clearly. - You MUST use the `plot_data` tool to generate visualizations (e.g., line charts, bar graphs) when appropriate to illustrate findings. Specify plot type and data. - Do NOT perform analysis on assumed or incomplete data. Use tools to get the actual data first. ## 3. Analysis Workflow & Planning: - **Clarify & Plan:** Understand the request. Outline your analysis plan: What questions are you answering? What data is needed? What methods/visualizations will you use? State this plan. - **Data Retrieval:** Use `run_query` to get the data based on your plan. - **Data Exploration & Cleaning (If Applicable):** Briefly examine the data. Note any cleaning steps needed or assumptions made. - **Execute Analysis:** Perform calculations, statistical tests, or aggregations as planned. - **Visualize:** Use `plot_data` to create relevant charts supporting your findings. - **Synthesize & Explain:** Interpret the results and visualizations. Explain your findings clearly, highlighting key trends, insights, or anomalies. Structure your explanation logically. - **Output Format:** Present your analysis as [Specify Format: e.g., 'a summary report with key metrics and embedded plots', 'a list of findings with supporting data points'].
Self-Correction: Added placeholder for the specific request. Made tool usage mandatory and more specific (SQL for query, plot type for visualization). Added a structured workflow including planning, data retrieval, potential cleaning, execution, visualization, and explanation. Emphasized clear explanation and specified the need for an output format.
Long Context Instructions:
6. Improved Strict Context QA:
# Task: Answer Question Based Solely on Provided Context

# Instructions (Read Before Context):
- Your primary task is to answer the "User Query" presented after the context.
- You MUST base your answer *exclusively* on the information contained within the following "External Context" section.
- Do NOT use any external knowledge, prior training data, or information outside of the provided text.
- Accuracy and adherence to the context are paramount.
- If the answer to the User Query cannot be definitively found within the External Context, you MUST respond *exactly* with the phrase: "I don't have the information needed to answer that based on the provided context." Do not elaborate, guess, or apologize.

# External Context:
--- Begin Context ---
[Paste Your Very Long Text Document Here. Ensure it's clearly delineated.]
--- End Context ---

# User Query:
[Paste the User's Specific Question Here]

# Final Instruction Reminder (Critical):
Remember: Answer the User Query using *only* the information present in the "External Context" above. If the information is not present, state exactly: "I don't have the information needed to answer that based on the provided context."
Self-Correction: Added clear sections. Placed detailed instructions before the context. Used stronger directives ("MUST," "exclusively," "exactly"). Explicitly forbade external knowledge. Repeated the most critical instruction after the context and query for reinforcement, as recommended by OpenAI.
7. Improved Context + Knowledge QA:
# Task: Answer Question Using Provided Context and Limited Supplemental Knowledge

# Instructions (Read Before Context):
- Answer the "User Query" presented after the context.
- Your primary source of information MUST be the "External Context" provided below. Prioritize information found within this text.
- When using information directly from the context, try to indicate this (e.g., "According to the provided text...").
- You MAY supplement your answer with your general knowledge *only* under these specific conditions:
    - To provide brief definitions of terms explicitly mentioned in the context.
    - To connect concepts logically *if both concepts are present* in the context.
    - To provide widely accepted, non-controversial facts that directly clarify a point made *within* the context.
- Do NOT introduce new topics or information not grounded in the External Context. Your general knowledge should only serve to enhance understanding of the provided text, not replace it.

# External Context:
--- Begin Context ---
[Paste Your Very Long Text Document Here.]
--- End Context ---

# User Query:
[Paste the User's Specific Question Here]

# Final Instruction Reminder (Critical):
Base your answer primarily on the "External Context." Use supplemental general knowledge sparingly and only to clarify or define elements *already present* in the context.
Self-Correction: Structured the prompt clearly. Placed instructions before context. Defined the hierarchy (context is primary). Explicitly defined the limited conditions under which external knowledge is permissible, aligning with the need for specificity with GPT-4.1. Repeated the core principle after the context/query.
8. Improved Document Summarization:
# Task: Summarize Key Findings in Specific Format

# Instructions (Read Before Document):
- Read the entire "Document" provided below from start to finish.
- Your goal is to identify and extract the most important conclusions, results, or key takeaways presented within the text.
- Synthesize these key findings into a concise summary.
- The final output MUST be formatted as exactly 5 (five) distinct bullet points. Each bullet point should represent a significant finding.

# Document:
--- Begin Document ---
[Paste Your Very Long Document Here.]
--- End Document ---

# Final Instruction Reminder (Critical):
Summarize the key findings from the document above. Your response must consist of exactly 5 bullet points.
Self-Correction: Added structure. Placed instructions before the document. Made the output format requirement (exactly 5 bullet points) very explicit and reinforced it using both number and word. Repeated the core task and format constraint after the document.
9. Improved Information Extraction:
# Task: Extract Specific Information (Error Messages and Timestamps)

# Instructions (Read Before Logs):
- Carefully analyze the "Log Files" provided below.
- Your objective is to identify and extract every instance of an error message along with its corresponding timestamp.
- Assume timestamps are located [Describe Expected Timestamp Format/Location, e.g., 'at the start of each relevant line in YYYY-MM-DD HH:MM:SS format'].
- Assume error messages are identifiable by [Describe Expected Error Indicator, e.g., 'lines containing the keyword "ERROR" or "Failed"'].
- Present the extracted information clearly. Format the output as a list, where each item follows this structure:
    `Timestamp: [Extracted Timestamp], Error: [Extracted Error Message]`
- If no error messages matching the criteria are found within the logs, respond *only* with the phrase: "No error messages found matching the criteria."

# Log Files:
--- Begin Logs ---
[Paste Your Long Log File Content Here.]
--- End Logs ---

# Final Instruction Reminder (Critical):
Extract all error messages and their corresponding timestamps from the logs above, using the specified format. If none are found, state that clearly.
Self-Correction: Structured the prompt. Placed instructions before the logs. Made the extraction criteria (how to identify timestamps and errors) placeholders for user customization, emphasizing specificity. Defined the exact output format per item and the response if nothing is found. Repeated the core extraction task instruction after the logs.
10. Improved Multi-Document Comparison:
# Task: Compare Main Arguments of Two Documents

# Instructions (Read Before Documents):
- Read both "Document A" and "Document B" provided below in their entirety.
- Identify the central argument, thesis, or main point being conveyed in *each* document separately.
- Perform a comparative analysis of these main arguments. Your analysis MUST address the following specific points:
    1. Concisely state the main argument of Document A.
    2. Concisely state the main argument of Document B.
    3. Identify and describe key similarities between their main arguments or approaches.
    4. Identify and describe key differences between their main arguments or conclusions.
- Structure your response clearly, perhaps using subheadings for each of the four points above.

# Document A:
--- Begin Document A ---
[Paste Full Text for Document A Here.]
--- End Document A ---

# Document B:
--- Begin Document B ---
[Paste Full Text for Document B Here.]
--- End Document B ---

# Final Instruction Reminder (Critical):
Compare the main arguments of Document A and Document B provided above. Ensure your comparison specifically covers the core argument of each, their similarities, and their differences.
11. Improved Simple CoT:
# Thinking Process (Output Before Final Answer):
Before providing the final answer to the user's query, please follow and *write down* these thinking steps:
1.  **Restate & Analyze Query:** Briefly restate the core question the user is asking. Identify key terms or constraints.
2.  **Identify Information Needed:** What specific information or knowledge is required to answer this query accurately?
3.  **Outline Answer Steps:** Briefly list the logical steps you will take to construct the final answer.

# Final Answer:
[Only after completing and outputting the thinking process above, provide the final answer here.]
Self-Correction: Changed from a vague "think step by step" to a structured 3-step process. Explicitly instructs the model to write down the output of each thinking step before the final answer, using clear headings.
12. Improved Planning CoT:
# Planning Phase (Output Before Execution):
Before executing the requested task "[User Task Placeholder]", create and *output* a detailed, step-by-step execution plan. The plan should include:
1.  **Objective:** Clearly state the final goal of the task.
2.  **Major Steps:** Break down the task into logical, sequential steps (use numbered points).
3.  **Potential Challenges/Considerations (Optional but Recommended):** Briefly note any anticipated difficulties or important factors for each step.

# Execution Phase:
[Only after outputting the complete plan above, proceed to execute the task according to the plan.]
Self-Correction: Made the instruction more formal ("create and output a detailed... plan"). Structured the required components of the plan (Objective, Steps, Challenges). Added a placeholder for the user task. Clearly separated the Planning Phase output from the Execution Phase.
13. Improved Debugging CoT:
# Debugging Analysis (Output Before Solution):
Analyze the following error: "[Error Message/Description Placeholder]". Before suggesting a solution, perform and *output* the following step-by-step debugging analysis:
1.  **Symptom Analysis:** Briefly describe the observed problem based on the error message and any provided context.
2.  **Hypothesize Potential Causes:** List at least [e.g., 3] plausible root causes for this error.
3.  **Reasoning for Each Cause:** For each potential cause listed, briefly explain *why* it could lead to the observed symptom/error.
4.  **Information Needed/Next Diagnostic Step:** What additional information or test would help isolate the true cause?

# Proposed Solution/Next Steps:
[Based on the analysis above, suggest the most likely solution or the next concrete diagnostic step to take.]
Self-Correction: Added a placeholder for the error. Structured the debugging process into logical steps (Symptom, Causes, Reasoning, Next Step). Explicitly asks for reasoning behind each potential cause. Clearly separates the analysis output from the proposed solution.
14. Improved Creative Writing CoT:
# Brainstorming Phase (Output Before Writing):
Before writing the scene requested "[User Scene Request Placeholder]", first engage in and *output* the following step-by-step brainstorming process:
1.  **Core Objective/Mood:** What is the main goal or feeling this scene should convey?
2.  **Potential Plot Points (Generate Exactly 3):**
    *   Plot Point 1: [Brief description]
    *   Plot Point 2: [Brief description]
    *   Plot Point 3: [Brief description]
3.  **Selected Plot Point & Rationale:** Choose one of the above points (or a synthesis) and briefly explain why it's the most promising for the scene's objective.

# Scene:
[Write the full scene based on the selected plot point and rationale from the brainstorming phase above.]
Self-Correction: Added placeholder for the scene request. Structured the brainstorming (Objective, Generate 3 Points, Select & Justify). Made the requirement for exactly 3 points explicit. Clearly separated the brainstorming output from the final scene writing.
15. Improved Complex Query CoT (OpenAI Example Inspired):
# Reasoning Strategy Execution (Output Each Step):
Carefully follow the provided Reasoning Strategy below to answer the user's question. You MUST *output your findings and analysis for each step* under the corresponding heading before proceeding to the next step or the final answer.

## 1. Query Analysis:
- Break down the user's query: "[User Query Placeholder]".
- Identify the core intent, key entities, and any ambiguities.
- Consider relevant context provided (if any) to clarify meaning.
[Output your Query Analysis here]

## 2. Context Analysis (If Applicable):
- Identify potentially relevant documents/sections from the provided context: "[Context Placeholder or Description]".
- Analyze each potentially relevant piece: How might it help answer the query? Rate its relevance (e.g., High, Medium, Low). Optimize for recall initially.
[Output your Context Analysis and relevance ratings here]

## 3. Synthesis:
- Summarize which documents/information (from context or internal knowledge if allowed by initial prompt) are most relevant to answering the query.
- Explain *why* they are relevant and how they connect to the query analysis.
- Outline the structure of your final answer based on this synthesis.
[Output your Synthesis here]

# Final Answer:
[Only after completing and outputting all steps of the Reasoning Strategy above, provide the comprehensive final answer to the user's query.]
Self-Correction: Kept the strong structure from the OpenAI example. Added placeholders for query/context. Crucially, added explicit instructions within the prompt and for each step ([Output your ... here]) to ensure the model writes down the results of each phase before moving on or providing the final answer. Used headings clearly.
The rest of the prompts are here.
Conclusion: Embrace the Precision
GPT-4.1 represents a powerful evolution in AI capabilities. Its strength lies in its improved coding, long context handling, and especially its precise instruction following. The key takeaway? Be explicit, be clear, and be structured.
Migrating your prompts might take a little effort, but the payoff is greater control and potentially much better results. By understanding its literal nature and leveraging techniques like agentic reminders, careful context management, CoT prompting, and detailed instructions, you can truly unlock the potential of this new model.
What prompting technique for GPT-4.1 are you most excited to experiment with first?